


If you’re dealing with an influx of water leaking from your ceiling, it can be stressful to schedule the nIf you have water leaking from ceiling surfaces anywhere in your home, fast action matters. Roof leaks are more than a nuisance because they can signal hidden problems that threaten structure, safety, and indoor air quality in Minnetonka and surrounding areas.
In this guide, you will learn:
- Early warnings: The most common signs that a ceiling leak has started.
- Root causes: How to tell if the source is roof, plumbing, HVAC, or condensation.
- Action plan: Proven fixes, costs, and when to call a professional.
5 Symptoms Of Water Leaking From The Ceiling
Recognizing a leak quickly helps you limit damage and repair costs. Water can travel before it shows up on the drywall, so the wet spot you see may be several feet from the true source.

What To Watch For
- Water drips: Visible droplets or a steady drip confirm active infiltration and demand immediate containment.
- Stains and discoloration: Yellow or brown rings that expand after rain or showers point to ongoing moisture.
- Sagging or bubbling: A swollen or drooping surface means water is pooling above the ceiling material.
- Peeling paint or wallpaper: Lifting or blistering coatings indicate trapped moisture behind the finish layer.
- Musty odors: Persistent earthy smells suggest mold activity within ceiling cavities or insulation.
Common Causes Of A Ceiling Leak
Multiple systems can be responsible, and each requires a different fix. Use the comparison below to align what you see with the most likely cause before you begin repairs.
Leak Source Comparison
| Likely Source | Tell-Tale Timing | Where Signs Appear | Fast Confirm | Typical Fix |
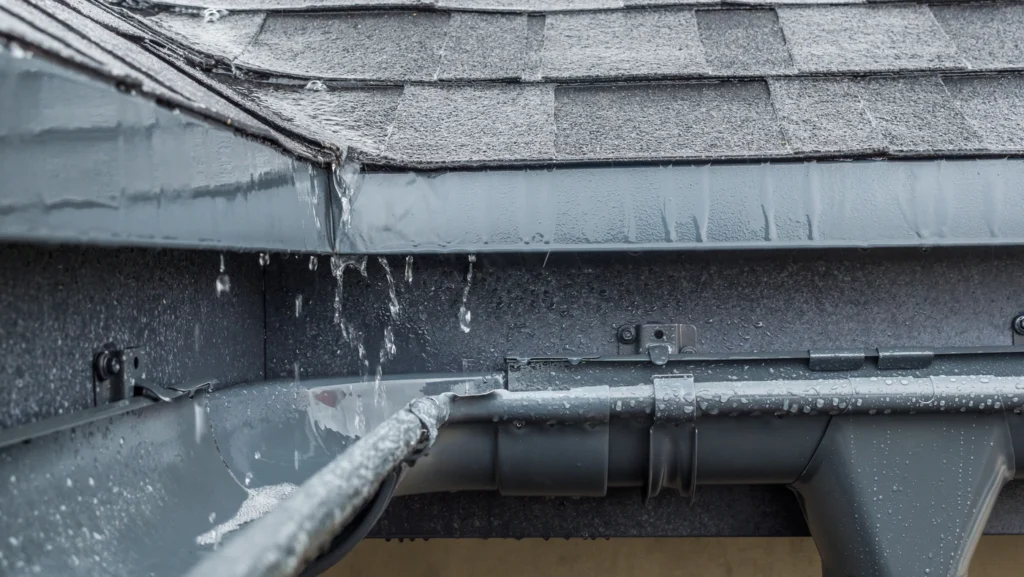
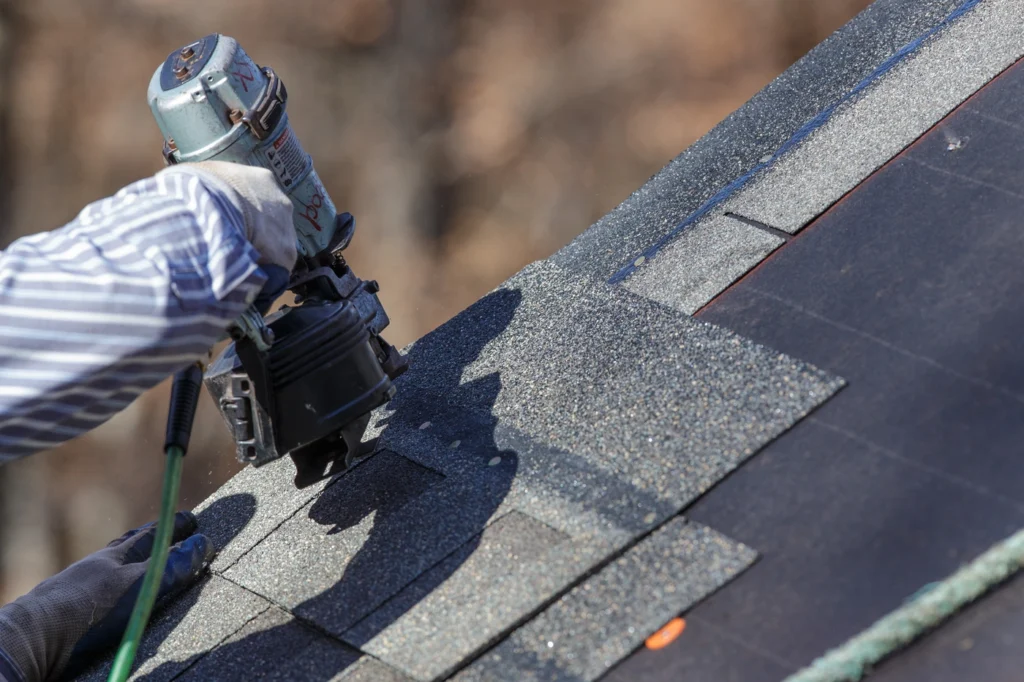
| Roof leak | After rain or snowmelt | Near exterior walls, light fixtures, or ceiling corners | Check shingles, flashing, and attic for wet decking | Patch shingles, seal flashing, clear gutters, improve ventilation |
| Plumbing leak | Any weather, often continuous | Directly below bathrooms, kitchens, or laundry | Inspect supply lines, traps, toilet seals | Repair fittings, replace seals, re-pipe short runs |
| HVAC condensation | When AC runs | Around vents or beneath air handler | Inspect condensate drain and pan, look for sweating ducts | Clear drain, replace pan, insulate ducts |
| Attic condensation / ice dams | Cold snaps and thaw cycles | Perimeter ceilings and exterior corners | Look for frosty nails, damp insulation | Air seal attic, add insulation, balance ventilation |
Why You Should Fix A Ceiling Leak Now
Waiting gives water time to spread and multiply the damage. Acting quickly protects structure, lowers health risk, and reduces the chance of secondary repairs in Minnetonka and surrounding areas.
What’s At Stake
- Higher costs later: Small patches can become full ceiling or roof replacements if ignored.
- Structural damage: Saturated drywall sags and collapses, and wet framing can rot or delaminate.
- Mold and mildew: Moist cavities become ideal habitats that threaten indoor air quality.
- Electrical hazards: Moisture near wiring and fixtures increases the risk of shorts and shocks.
- Lower resale value: Documented water issues and stains can scare off buyers or lower offers.
5 Proven Fixes That Work
You do not need to find every root cause before taking smart first steps. These fixes stabilize the situation, limit damage, and prepare the area for a lasting repair by a qualified pro.
- Call a qualified contractor: For roof, plumbing, or HVAC issues, schedule a professional inspection. Ask for photos, a clear scope, and whether venting or insulation upgrades are recommended to prevent a repeat.
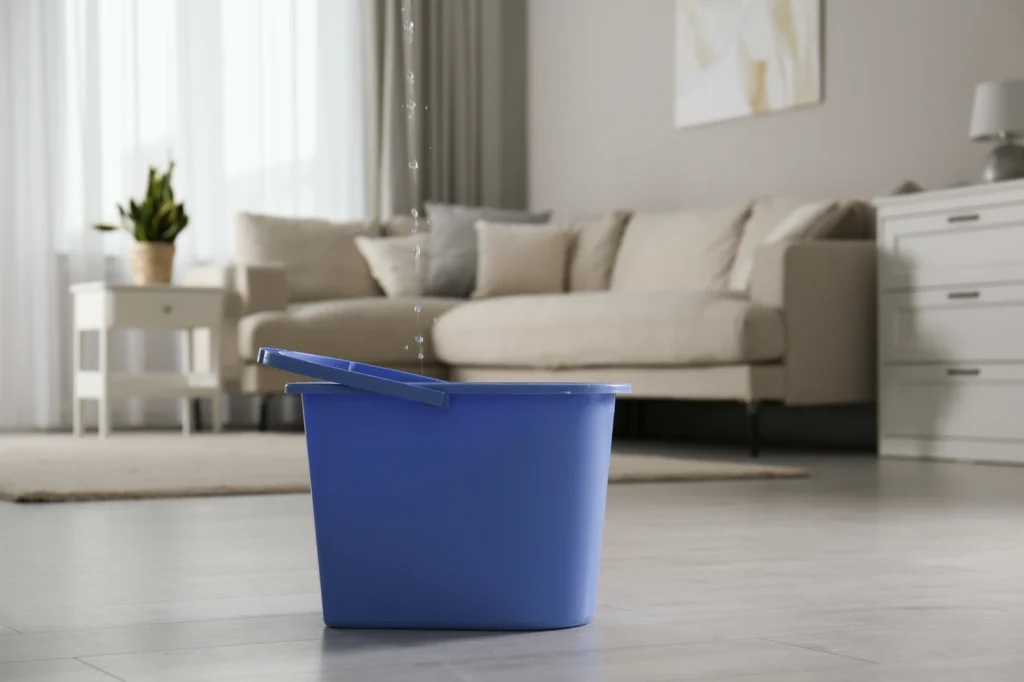
- Contain and relieve pressure: Place a bucket under the drip, move valuables, and pierce the lowest point of a bulge with a screwdriver to drain pooled water into the container.
- Shut off electricity to the area: Turn off the breaker that serves the wet room if moisture is near lights or outlets to eliminate shock risk.
- Track the source methodically: If rain triggered the leak, check the attic for wet decking, stained rafters, or light at penetrations. If dry weather, inspect plumbing above the spot and run fixtures one at a time.
- Create a temporary weather shield (roof-related): If it is safe, cover the suspect area with a peel-and-stick roof patch or a small tarp secured to decking, not just to shingles.
What To Do The Moment You Spot A Leak: Step-By-Step
Even after quick fixes, a structured response helps protect your home and your insurance documentation.
Immediate Action Plan
- Safety first: Turn off power near wet fixtures and keep children and pets away from the area.
- Document everything: Take wide and close photos of stains, bulges, attic wet spots, roof damage, or failed fittings.
- Dry what you can: Use fans and a dehumidifier to start drying the room and ceiling cavity.
- Call the right pro: Roofing for post-storm leaks, plumbing for wet bathrooms or kitchens, HVAC for AC-season drips.
- Notify insurance: Report sudden and accidental damage early and keep receipts for mitigation expenses.
- Schedule follow-up: Plan a 2-week recheck after repairs to confirm the area stays dry.
Cost Considerations For Ceiling Leak Repairs
Pricing varies with cause, access, and how quickly you respond. Early containment nearly always lowers total costs; extensive structural or mold work increases scope.
Ceiling Leak Repair Cost Breakdown
| Type of Repair | Estimated Cost Range | Notes |
| DIY containment and drying | $50–$200 | Buckets, plastic sheeting, fans, dehumidifier rental |
| Roof leak repair | $300–$1,200 | Shingle patch, flashing reset, minor decking repair |
| Plumbing leak repair | $150–$800 | Supply or drain fixes, toilet wax ring, small section re-pipe |
| HVAC condensation fix | $200–$600 | Clear condensate line, replace pan, insulate ducts |
| Mold remediation | $500–$6,000+ | Depends on area size and material removal scope |
| Ceiling drywall repair | $300–$1,500 | Cut-out, patch, texture, paint for typical rooms |
| Ceiling replacement | $1,500–$5,000+ | Large rooms, plaster ceilings, or specialty finishes |
| Attic insulation top-off | $1,000–$3,000 | Common after ice dam or condensation issues |
When To Call A Professional
Many leaks require specialized tools and safe work at height. DIY containment is helpful, but lasting solutions usually come from licensed experts who can diagnose the full moisture path and correct it the first time.
Choosing The Right Partner
- Experience: Look for contractors with documented leak detection and repair photos, not just replacements.
- Local insight: Pros who work in Minnetonka and surrounding areas understand ice dams, wind patterns, and code requirements.
- Clear scope: Ask for a written plan describing cause, repair steps, and prevention recommendations.
- Warranty: Quality firms back materials and workmanship so you are covered if issues reappear.

FAQs For Homeowners In Minnetonka And Surrounding Areas
How do I know if it is roof or plumbing?
Timing is the biggest clue. If leaks appear after storms or snowmelt, suspect the roof. If they persist in dry weather or under a bathroom, check plumbing first.
Is it safe to poke a hole in a bulging ceiling?
Yes, if you can do so safely. Relieving trapped water prevents a larger rupture. Place a bucket under the bulge and puncture the lowest point carefully.
Can I just paint over a stain after it dries?
Only after the source is fixed and the area is dry. Use a stain-blocking primer before repainting to prevent tannin rings from bleeding through.
Why does my ceiling leak only in winter?
Attic condensation or ice dams are likely. Air seal the attic, improve insulation depth, and balance intake and exhaust ventilation.
Keep Water Out For Good With Northface Construction
Ceiling leaks escalate quickly, but a focused plan limits damage and speeds recovery. Northface Construction helps homeowners in Minnetonka and surrounding areas diagnose the true source, stop the leak, and prevent it from returning with smart ventilation, insulation, and flashing details.
Contact Northface Construction today for a free quote and get a fast, durable fix that protects your home and restores peace of mind.
